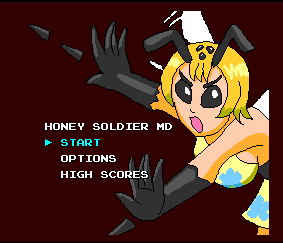
Developing the Genesis/Megadrive port
Decades ago, my parents bought me a Sega Genesis model 1. It was love at first sight with the fast and smooth arcade action of Sonic, Shinobi, Thunder Force, Alien Soldier and more.
This summer, I made Honey Soldier MD, my own Sega Genesis game. I want to document my development experience in the hope that it will be useful and inspiring to other developers.
Readers with experience in C programming, vector math, trigonometry, and game development will get the most out of this piece.
Origins
In 2006, Gens emulator developer Stephane Dallongeville released the tools that over time evolved into SGDK. Since then, the Genesis platform has not only survived but thrived, with even fully-fledged commercial titles like Earthion still coming out to this day.
In 2022 I made Honey Soldier for the Gunner Parade game jam. It targeted modern PC and mobile platforms, but the presentation was loosely inspired by 90’s console games, without regard for their actual hardware limitations. Still, I had been Genesis-curious for some time, and two years later, I happened to notice SGDK was in version 2.00. As I looked over the many features and conveniences it offered, the idea of porting Honey Soldier began to form.
Reasons
Technically, porting Honey Soldier was the most natural choice for a first Genesis project. Besides being one of my stronger titles, it is small enough to port in a relatively short time (for game development, that is). And many of its specs matched the Genesis specs or at least were not too much of a leap, such as viewport resolution (256x224) and background tile size (16x16, a multiple of Genesis’ 8x8).
I first tried SGDK only intending to evaluate how it worked and what it was like to use, and happened to have Honey Soldier’s files on hand to try things with. But once I got going, it was hard to stop. Something about developing with SGDK was powerfully addicting - maybe how quick and easy it was to make most things work, and how it worked together so well with my other game tools.
In any case, it made me feel that a faithful port was within reach, so I seized upon that momentum to accomplish that to the best of my ability. I also relished the opportunity to get another finished project on my belt, and to enjoy my childhood console from the other side.
Tools
SGDK is provided in source and Windows binary form on GitHub. Its key components are a resource compiling tool and a C API and toolchain.
On Windows, it is easily installed by following the wiki instructions. For Linux, there is MARSDEV, a cross-platform toolchain which has the option to build SGDK and should work on Mac OS as well.
For working in VS Code, there is the extension Genesis Code. I used it to create the project, with came with skeleton code and all the needed project configurations.
Probably the best Genesis development emulator is BlastEm, which supports GDB remote debugging. The Genesis Code extension has a “Gens path” setting, which should be set to the BlastEm executable path.
Aseprite is the current king of pixel graphic tools. Its many conveniences make creating for Genesis and other retro consoles a breeze.
The original game’s level was made in Tiled. It offers a JavaScript API which I used to write a plugin exporting the level in the game’s level format.
Any performance issues can be investigated with md-profiler and a special profiling version of BlastEm.
Altogether these tools provided a development experience that studios of the time, maybe even Sega themselves, could have only dreamed of.
Asset pipeline
The original asset files are PNG images, MP3 sounds, and Ogg music, but the Genesis predates those formats. SGDK comes with the rescomp tool for compiling many types of assets into Genesis-compatible data.
In one or more resource files, list your asset files and import parameters. Whenever you build the game, rescomp automatically makes C object code and header files out of the listed assets. In your source code, include these header files and you can access the assets.
Audio
SGDK provides five audio drivers. They vary in supported sound quality, number of available channels, and support for FM synth music. You can switch between drivers to support different audio needs in each game phase.
My first choice was XGM2, the latest driver with FM music support. Though easy to use, it seemed to be a work in progress still. What did not work for me was the priority feature: when sending two sounds with different priorities to play on the same channel, the priorities seemed to have no effect. A higher-priority sound could be cut off by a lower-priority one, or would refuse to cut off a lower-priority one.
I tried switching to the older XGM driver. Its way of playing sounds is a little more roundabout. First assign each sound an integer ID, then pass an integer ID to play a sound. But priorities worked as they were supposed to.
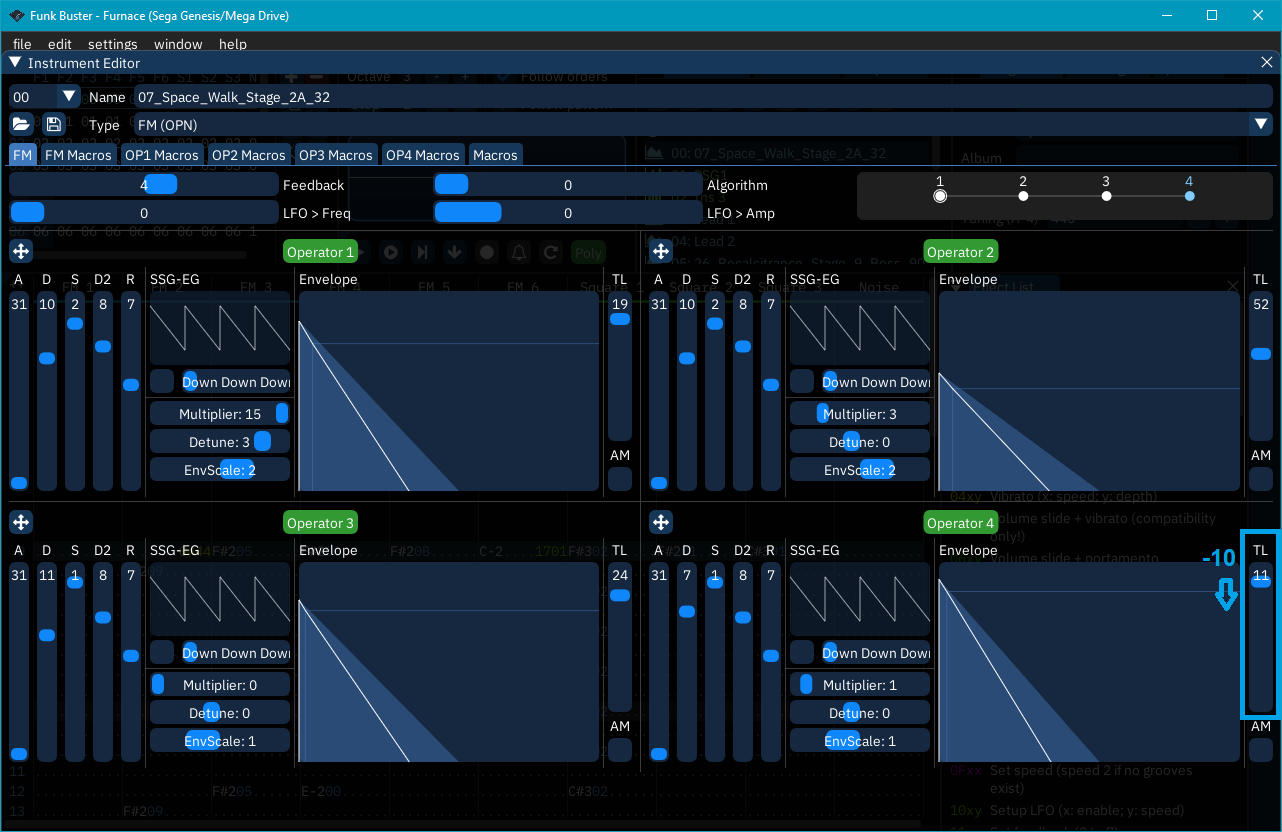
For each audio asset, you specify a driver to play it with. My musician Tytanium654 provided the Deflemask project file for his song Funk Buster, from which I exported a VGM file, which rescomp compiles into XGM music data. The MP3 sounds only had to be converted to WAVs in Audacity, and rescomp automatically downsamples WAVs to a supported sample rate.
Probably the biggest audio problem I faced was the music volume. The song was originally made for standalone listening; in-game, it tended to drown out lower sound effects. Additional complicating factors were the lack of volume controls in the XGM driver and rescomp not supporting volumes set in VGM files. Per Tytanium’s suggestion, I grabbed a copy of the Furnace tracker and lowered each instrument’s Operator 4 level. A reduction of around -10 each sounded about right.
Graphics
Out of all the things to port, the graphic assets demanded the most thought and creativity. Converting the assets to the Genesis’ 16-color indexed format was only the first step.
Palette sharing
There are four 16-color palettes in the Genesis. In order to show many types of variously-colored objects at once - background, player, enemies, bullets, powerups - objects must share palettes with other objects that appear alongside them. This means further reducing colors per object (each object ended up with between 2 and 8), rearranging colors to better organize them (or to make multiple palettes applicable to the same sprite), and copying colors between images to keep their palettes in sync.
Aseprite comes to the rescue with its highly manipulatable palette. You can move, copy, paste, and sort the colors however you need. If your change discolors any pixels, a Remap Palette button can fix them with one click.
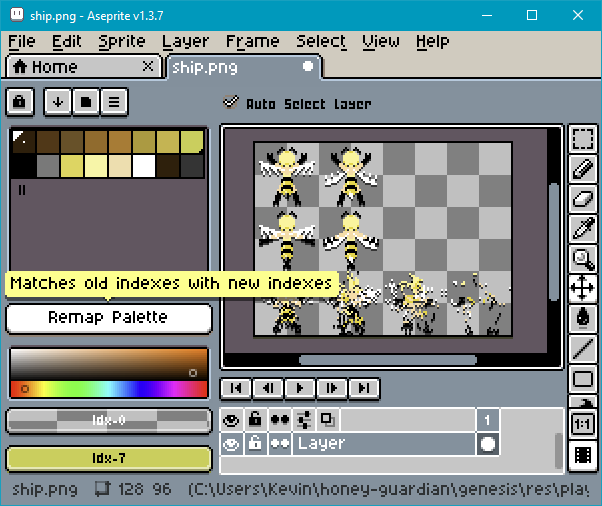
Imagine if 90’s game artists had to do such a thing with their primitive paint tools mid-development. Good designers would have carefully planned their projects from the start with tight limits on art and level design to avoid such catastrophe.
Resource types
Once images have been made Genesis-friendly, you can define several types of resources from them. The most common in this port is SPRITE, a free-moving object with animation frames. Some sprite images were also used as PALETTE resources; PALETTE is an array of the colors from the image palette. The background was exported from Tiled as an image and imported as a TILESET resource and a MAP resource. The font is another TILESET.
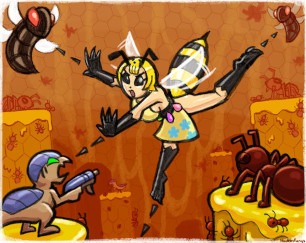
Finally there is one IMAGE resource for the title picture. IMAGE is meant for a full-screen graphic using all four palettes. The image must be convertible to a tile map where all colors in each 8x8 tile are from a single palette. I explored options for converting the cover illustration by hooksnfangs to fit in those constraints, but realized the editing work to accomplish it was prohibitive (never mind making it look good in the Genesis color space). Instead I traced a portion of the hero Jenny in 16 colors as best I could.
Sprite rotation
The Genesis does not provide hardware rotation, so bullets and some enemies have pre-rotated sprite animations. Most objects such as bullets only needed angles from 0 degrees (right) to 90 degrees (down) inclusive. Horizontal and vertical flipping produces the other angles.
One enemy, the beetle, climbs up diagonally onto ledges and needs an additional 135-degree angle. There is no way to flip the 45-degree angle to produce it, because he is not symmetrical about the direction axis.


To pick the rotated animation given a desired direction vector, your first instinct might be getting the angle with arctan2 and converting that to an animation number. SGDK doesn’t have an arctan2, so I found an approximation that was low in error and fairly easy to implement.
Unfortunately, I observed noticeable error around the diagonal angles, where some bullets appeared to fly almost sideways. I didn’t investigate deeply, but it could be a mistake in my implementation of the approximate arctan2, or that I didn’t use a more precise fixed-point number type.
After some thought, I arrived at a different formula with no need for an angle. Given N rotation animations from 0-90 degrees inclusive, and the face vector (x, y), the correct animation i is
i = floor(
    N/2 * |y/x| + 0.5           if |x| >= |y|
    N - (N/2 * |x/y| + 0.5)     otherwise
)
Only bullets used this formula; enemies knew exactly which angle to face where, and set the appropriate animation and flip flags directly.
Why add 0.5? To minimize the divergence of the sprite angle from the true angle. Without it, the maximum divergence would be the full angle difference between two rotation sprites - if a bullet’s rotation sprites were every 45 degrees, then a bullet facing 44 degrees would appear to face 0. Adding 0.5 halves that divergence.
Many games just have round bullet sprites to avoid such calculations. But that felt like a cop-out and contrary to the goal of porting faithfully to the best of my ability. Of course, if I were on a schedule, it would be smartest to at least start with round bullets and add rotation if time and CPU budget allowed.
Compression
All graphics resources support compression, letting you save ROM space at the expense of some CPU time for decompression. I’ve learned you should wait to use this until you know you need it and you know how to mitigate the cost. At first I tried AUTO compression on my resources, but this had performance consequences when combined with the default sprite animation system detailed in Sprites.
Level
The level contains background tile layers, enemies and other objects that will appear, movement path lines, actions at path points, and triggers that make object spawns and other game events happen when the camera reaches them. There are two copies in the project: one in Tiled’s native TMX format for editing, and one in Lua code for the game to load.
On the Genesis, of course, either format would take a huge portion of ROM and many seconds to parse at runtime. Fortunately, the background is already handled as TILESET and MAP graphic resources. Now how to get at the other elements?
Rescomp offers an OBJECTS resource type, pulling layers of objects and their properties from TMX files. But my level’s structure made it less than fit for this method. It has over 100 object layers each representing a spawn group. A spawn group contains objects to spawn, the spawn trigger(s), and the objects’ paths and path actions. The resource file to get these would accordingly be 100+ layers long.
Having the dubious privilege of knowing some JavaScript, I took the more flexible and powerful option of writing an export plugin for Tiled. I wrote out all the groups of objects and triggers as C data structures immediately usable by the game engine, in a similar fashion to how rescomp makes resources (except I output C source code while rescomp outputs binary object code).
Engine
SGDK comes with more than enough handy modules to start a game engine with.
Backgrounds
The easy tile map engine constructs a Map out of MAP and TILESET resources. As you scroll the Map, it streams new map data from ROM into the Genesis’ two tile layers: background and foreground, supporting worlds larger than the hardware limit (total of 4096 tiles per layer, 8x8 pixels per tile).
For some extra flair when the boss appears, I also played with the horizontal scanline scrolling mode. The Genesis can horizontally scroll full plane, per row (8px tall), or per scanline, and vertically scroll full plane or per column (16px wide).
Sprites
The sophisticated sprite engine implements software sprites to get around limitations of Genesis hardware sprites. For example, the maximum hardware sprite size is 4x4 tiles; a larger object must be made of multiple hardware sprites. The sprite engine takes care of that when you use SPRITE resources larger than 4x4.
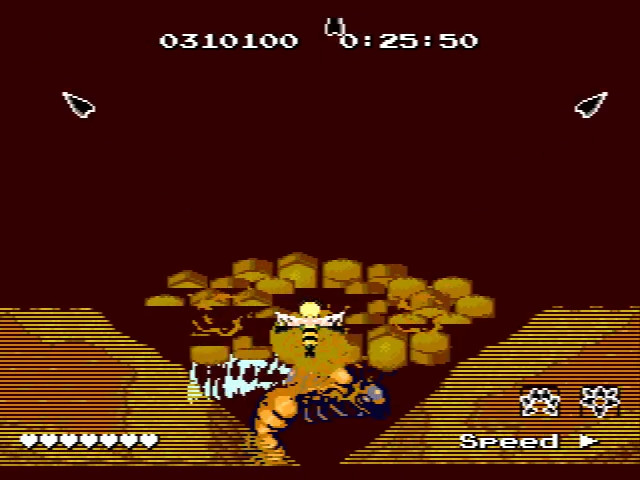
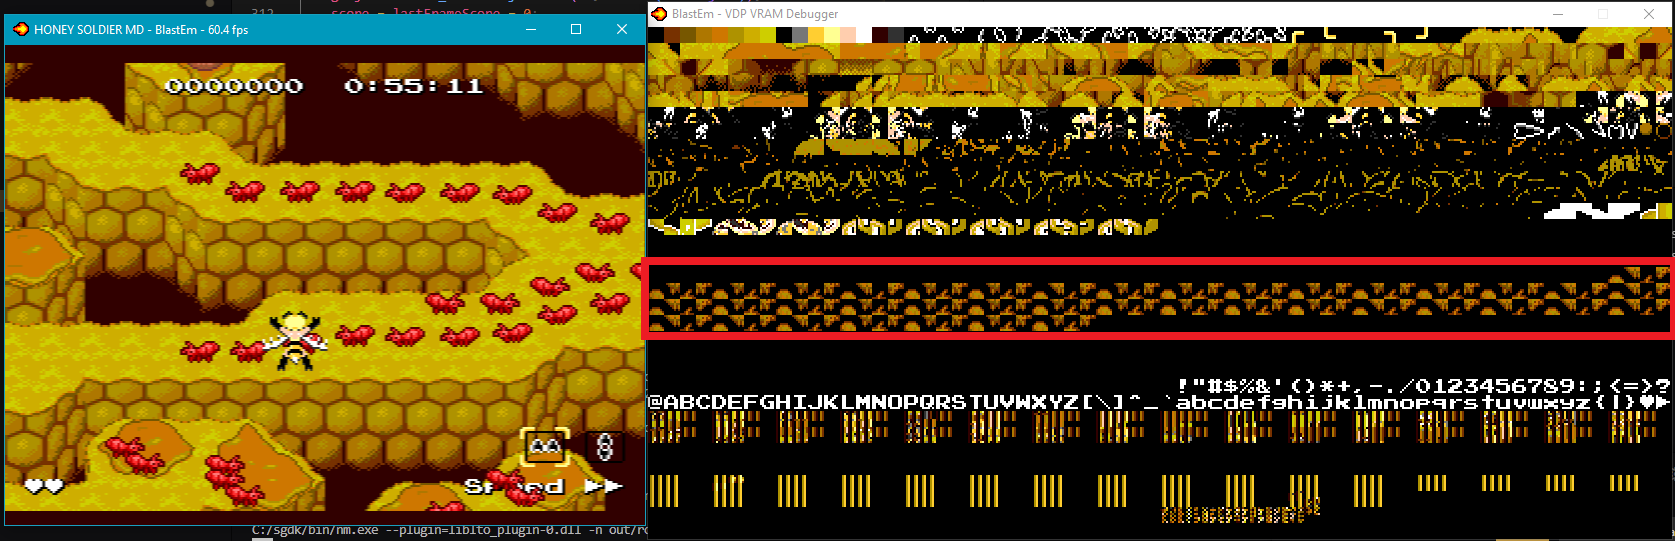
By default, sprites animate automatically, but with some costs in data transfer time and video memory space. The sprite engine loads a copy of every sprite instance’s current frame into the video memory. Note the many duplicate ant sprites.
It lets you get things moving quickly, but sooner or later, you’ll want to manually preload the frames into memory and point your sprite instances to them. This will free up CPU and video memory for greater object quantity and variety. So that is what I eventually did, dividing the sprite resources into “common”, “stage part 1”, “stage part 2”, and “stage boss” groups and placing level triggers to load each group as needed.
Preloading is even more necessary if you compress your sprite resources. Otherwise the default auto animation decompresses every new animation frame, hurting the game performance even further. This happened to me early on because of AUTO compression on my sprite resources as mentioned in Graphics. Preloading alone would fix most of the problem except the mid-game sprite loads would likely cause noticeable hiccups. So I dropped the compression.
Palettes
Backgrounds and sprites also need their colors loaded into palettes in order to look right. Based on the combinations of objects appearing in the level, I devoted one palette to permanent objects (player, powerup, background, GUI) and the other three to temporary objects (enemies, containers, bullets).
I managed the temporary object palettes using an LRU cache. If an object spawned and its colors were not already in a palette, the least recently used colors were overwritten.
To save some video memory, I animated flashing bullets with palette cycling - swapping the colors of the bullet back and forth in the palette - instead of real animation frames.
Game objects
The provided object pool data structure is convenient for allocating and managing temporary objects such as enemies and bullets. This was my first exposure to anonymous structs, a C language extension enabling data inheritance. Game objects that you want in the pool will inherit from a base Object struct. The most important inherited member is the update callback, called when you update the entire pool.
typedef struct GameObject
{
    Object;
    Vect2D_f16 pos, vel;
    Sprite* sprite;
    /* etc. */
} GameObject;

void updateGameObject(GameObject *gobj);

Pool *gobjPool = OBJ_createObjectPool(NUM_OBJECTS, sizeof(GameObject));
GameObject *gobj = (GameObject*) OBJ_create(gobjPool);
gobj->update = (ObjectCallback*) &updateGameObject;
OBJ_updateAll(gobjPool);
In the original Lua code, object behaviors were written as coroutines. I could express a whole sequence of actions in a single function, for example a boss’ death. C doesn’t have coroutines, but you can break up a coroutine into functions and replace the coroutine’s local variables with object struct variables. The same boss death in C is one start function and one update loop function.
GUI
The GUI is a simple one made mostly of text. SGDK has text drawing functions which are specialized tile drawing functions, converting characters to tiles in a built-in 8x8px font tileset. You can overwrite the font tileset with your own, and apply tile properties like palette and flipping to the letters using the more advanced text drawing function. It’s up to you to adapt these functions to draw larger fonts if you need them to.
High score save
Users’ data such as high scores are written to SRAM (static RAM). You have to enable SRAM writing before you write to it. I found no info on any dangers of leaving SRAM write enabled, such as possible data corruption from a hardware fault. Still I always disabled SRAM writing afterwards to be safe.
One gotcha with SRAM is that initial values are unpredictable. Even an emulator may fill it with zeroes, or with a nonzero value that certain games depend on, or with random values to be true to the hardware. The way I handle this is to define valid ranges for the data values and sanity-check the values on boot. If even one field is an out-of-range value, consider all data uninitialized and reset it all to defaults. Provided a decent amount of data fields and not too large valid ranges, the odds of every initial value being valid can be near zero.
Optimization
If you’re used to developing for modern systems, one hurdle to clear on the Genesis is its CPU: 7.6 MHz, one core, no cache, no pipeline, no FPU. For its age it can still be “blazingly fast”, as they say, provided you know what the faster operations are and find algorithms that use them.
When you see performance drop, you can log a trace using the profiling version of BlastEm. md-profiler can convert the trace to a JSON file, which you can feed to Google Chrome’s tracing ui. Even when profiling a release build with many of the function calls inlined, it’s not hard to tell which parts of the graph correspond to what parts of the code.
An easy and classic optimization is minimizing multiplication and division (modulo included) in favor of bit shifting. Historically, integer multiplication and division have been the slowest arithmetic operations. Where a factor or divisor is a power of 2, do a shift instead.
Vector normalization
But what about cases like moving to a destination point, a very common game action that involves normalizing a distance vector of arbitrary length to get a velocity?
Another benefit of the Tiled export plugin is that it can precalculate as it exports. In it I precalculated lengths and unit vectors of path segments; assigning speeds to paths and path points let me precalculate velocities too. Then moving an object to a path point involved only adding velocity to object position and subtracting speed from distance left to travel. I also preassigned objects to whatever paths they were on, starting at whatever path point they were on, to avoid searches at runtime.
When moving to a variable destination like the player position, normalizing is unavoidable, in particular the division. But for getting the distance, SGDK offers an approximate distance function using only adding and shifting. Whatever inaccuracy it had didn’t noticeably throw off the speed or direction of the movement.
Collision checking
As in most games, the hottest of the hot loops would have to be the collision loop, a simple O(n^2) check of everything against all of its opponents. I briefly tried some fancy stuff with space partitioning but couldn’t get it right in the time I was willing to devote. To make it performant enough, all I really needed to do was calculate objects’ extents after every move for the quickest possible AABB check.
Number printing
One of the more hidden performance pitfalls is printing score and other numeric values with sprintf. But it makes sense when you think about how sprintf must work: repeated divides and modulos to get decimal digits. Profiling confirmed this with a divmod (combined divide and modulo) function appearing multiple times per sprintf call.
The solution is binary-coded decimal numbers. SGDK has integer-to-BCD using only one or two divmods. Printing is done with cheaper bitwise ands and shifts although you have to DIY at time of writing.
What isn’t optimized
Some areas originally had so many enemies or bullets, no optimization would let them run at full speed unchanged. I accepted slowdown in parts where it added some dramatic or climactic effect, such as the midboss fight or the boss entrance, or where enemies fire a lot of bullets and you might appreciate having more of a chance to dodge them all.
Where neither of those applied, I did reduce the enemy counts. To compensate, I increased the score value of remaining enemies, and added secret shootable bonus items in the level, a staple of these caravan shooter games that I somehow never thought to include before.
Results
After seven weeks of work, I called the port done and released it to itch.io. It achieved a faithful reproduction of the original game in look, sound, feel, and play. Most differences were minor and harmless, like color changes for palette sharing. As for the big obvious ones, either they came with some benefit of their own or I added something to make up for them.
I had an amazing time developing with SGDK. Stephane’s goal was “to have a free and fully functional development kit but still to keep it as small as possible” and SGDK scores high on all these points. It simplifies and accelerates the Genesis development process, making it quick and easy to implement all the core functionality you take for granted as a player. It is full-featured without feeling bloated - providing more than everything you need to make a quality Genesis game, with multiple options having clear tradeoffs between costs and capabilities so choice paralysis was rare. No wonder the Genesis games since its release number in the hundreds from all over the world…and they’re still growing.
Conclusion
This port was a great exercise for my development skills, and I would absolutely do more work for the Genesis given a professional opportunity. I’ve been in touch with a publisher to explore a potential cartridge release. I can’t say if or when, but the ideas and possibilities are exciting…
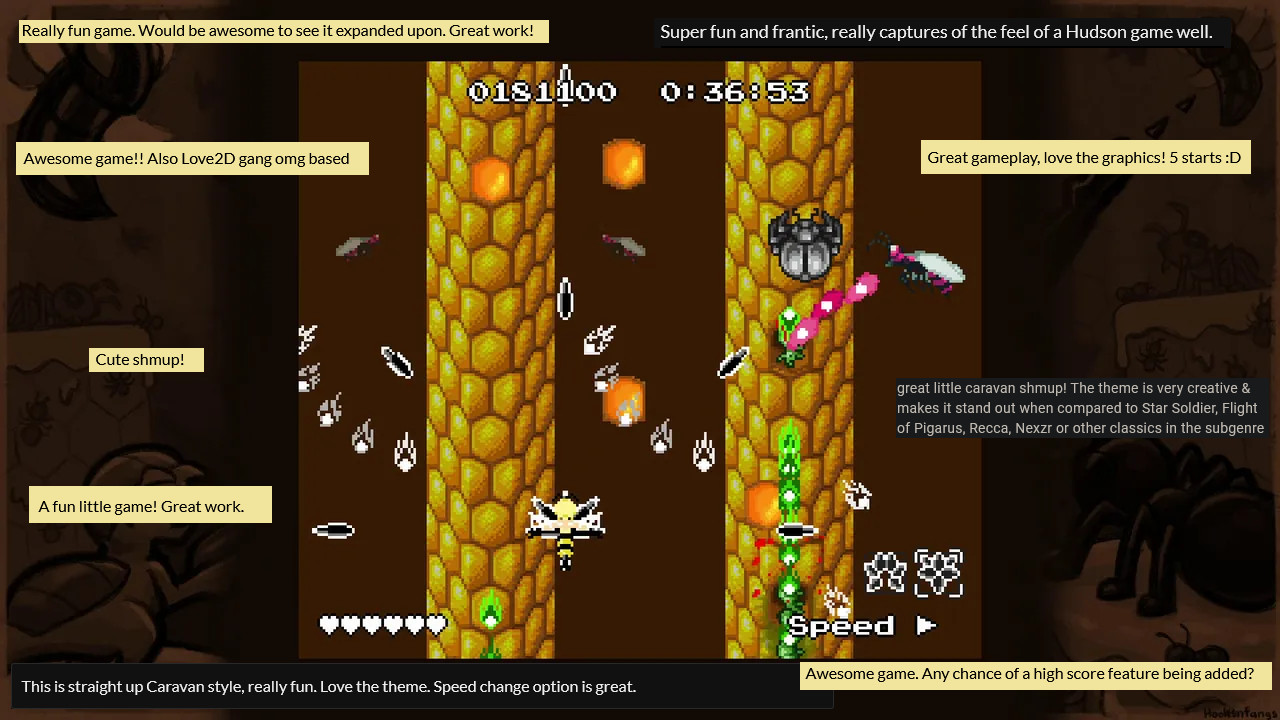
Leave a comment
Log in with itch.io to leave a comment.